Turn screen captures into Markdown and JSON on Mac
4 min read
OCR gives you text. That is useful, but it is not always enough.
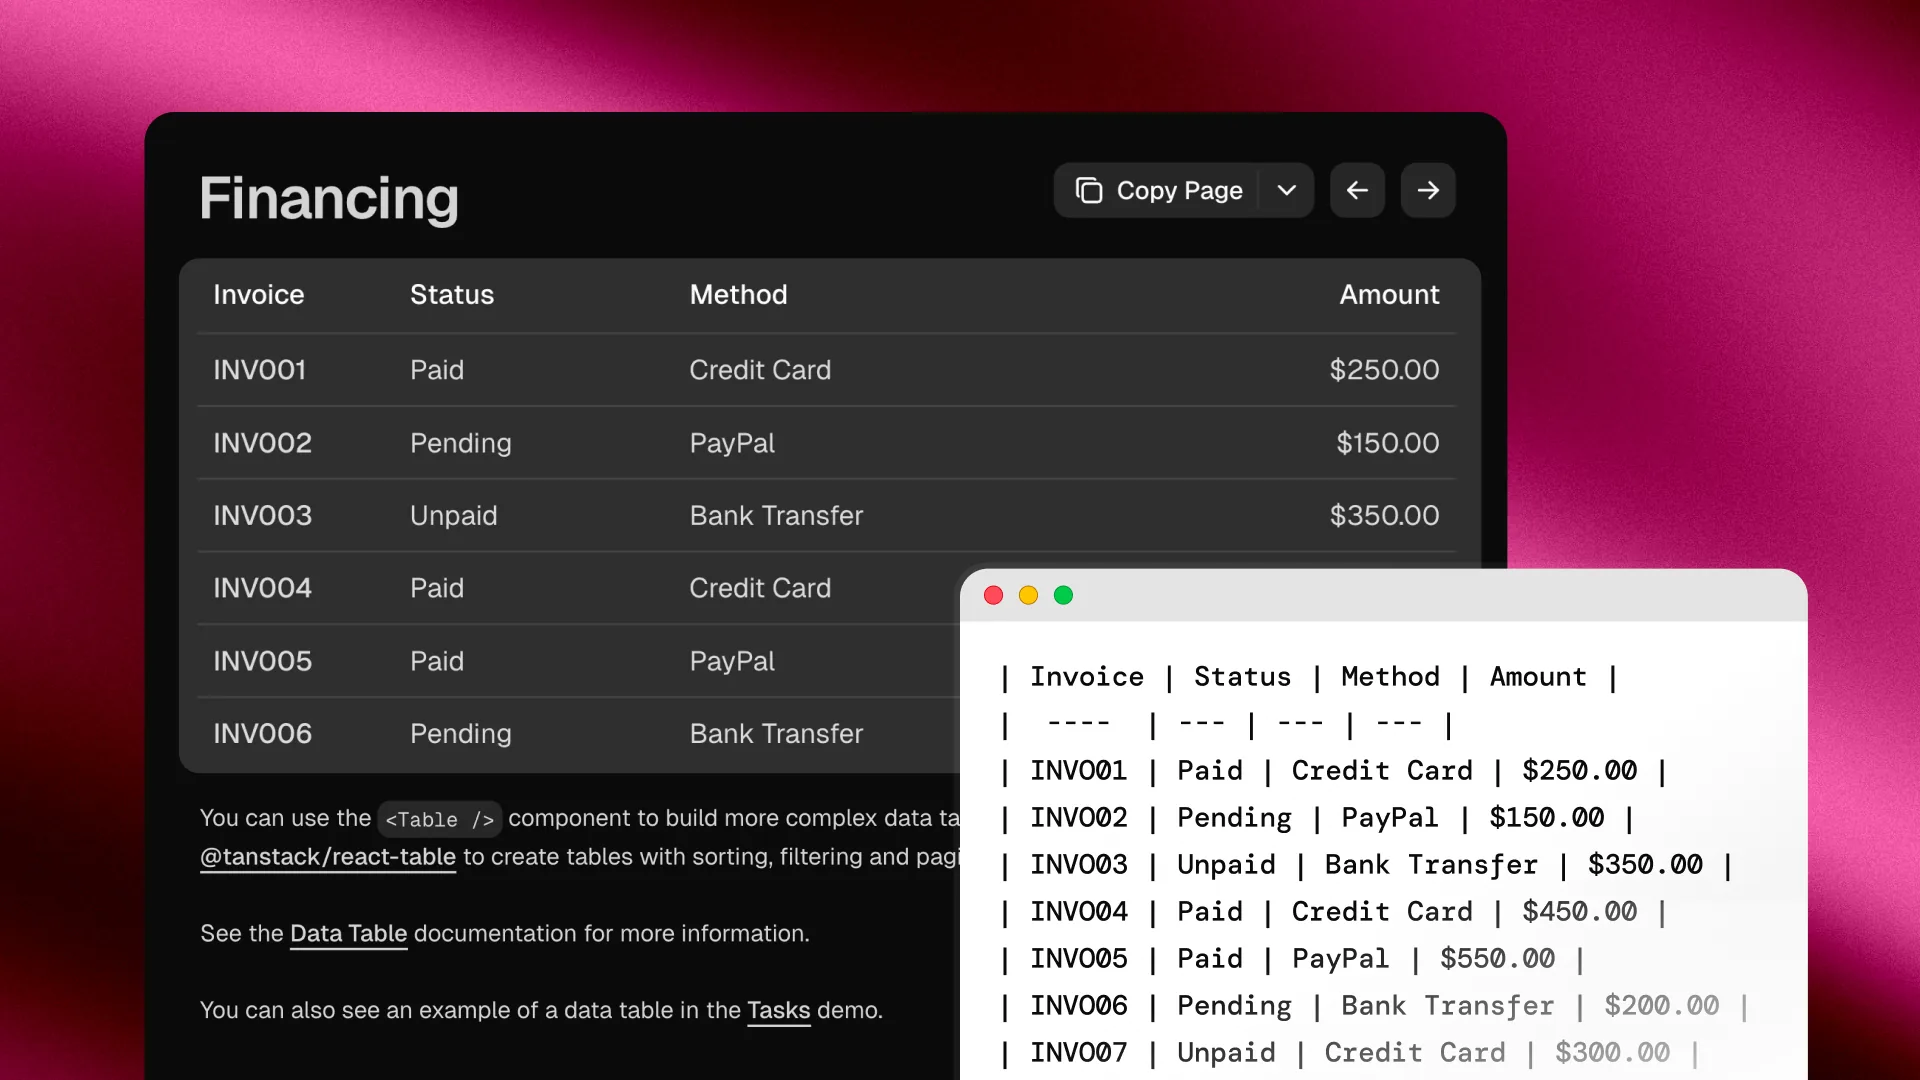
You capture a table from a screenshot. You get the cell values back as a wall of text. The structure is gone. You spend the next two minutes manually rebuilding it into rows and columns in your editor. You wonder why a computer that can read pixels cannot also tell that those pixels were arranged in a grid.
Two kinds of capture
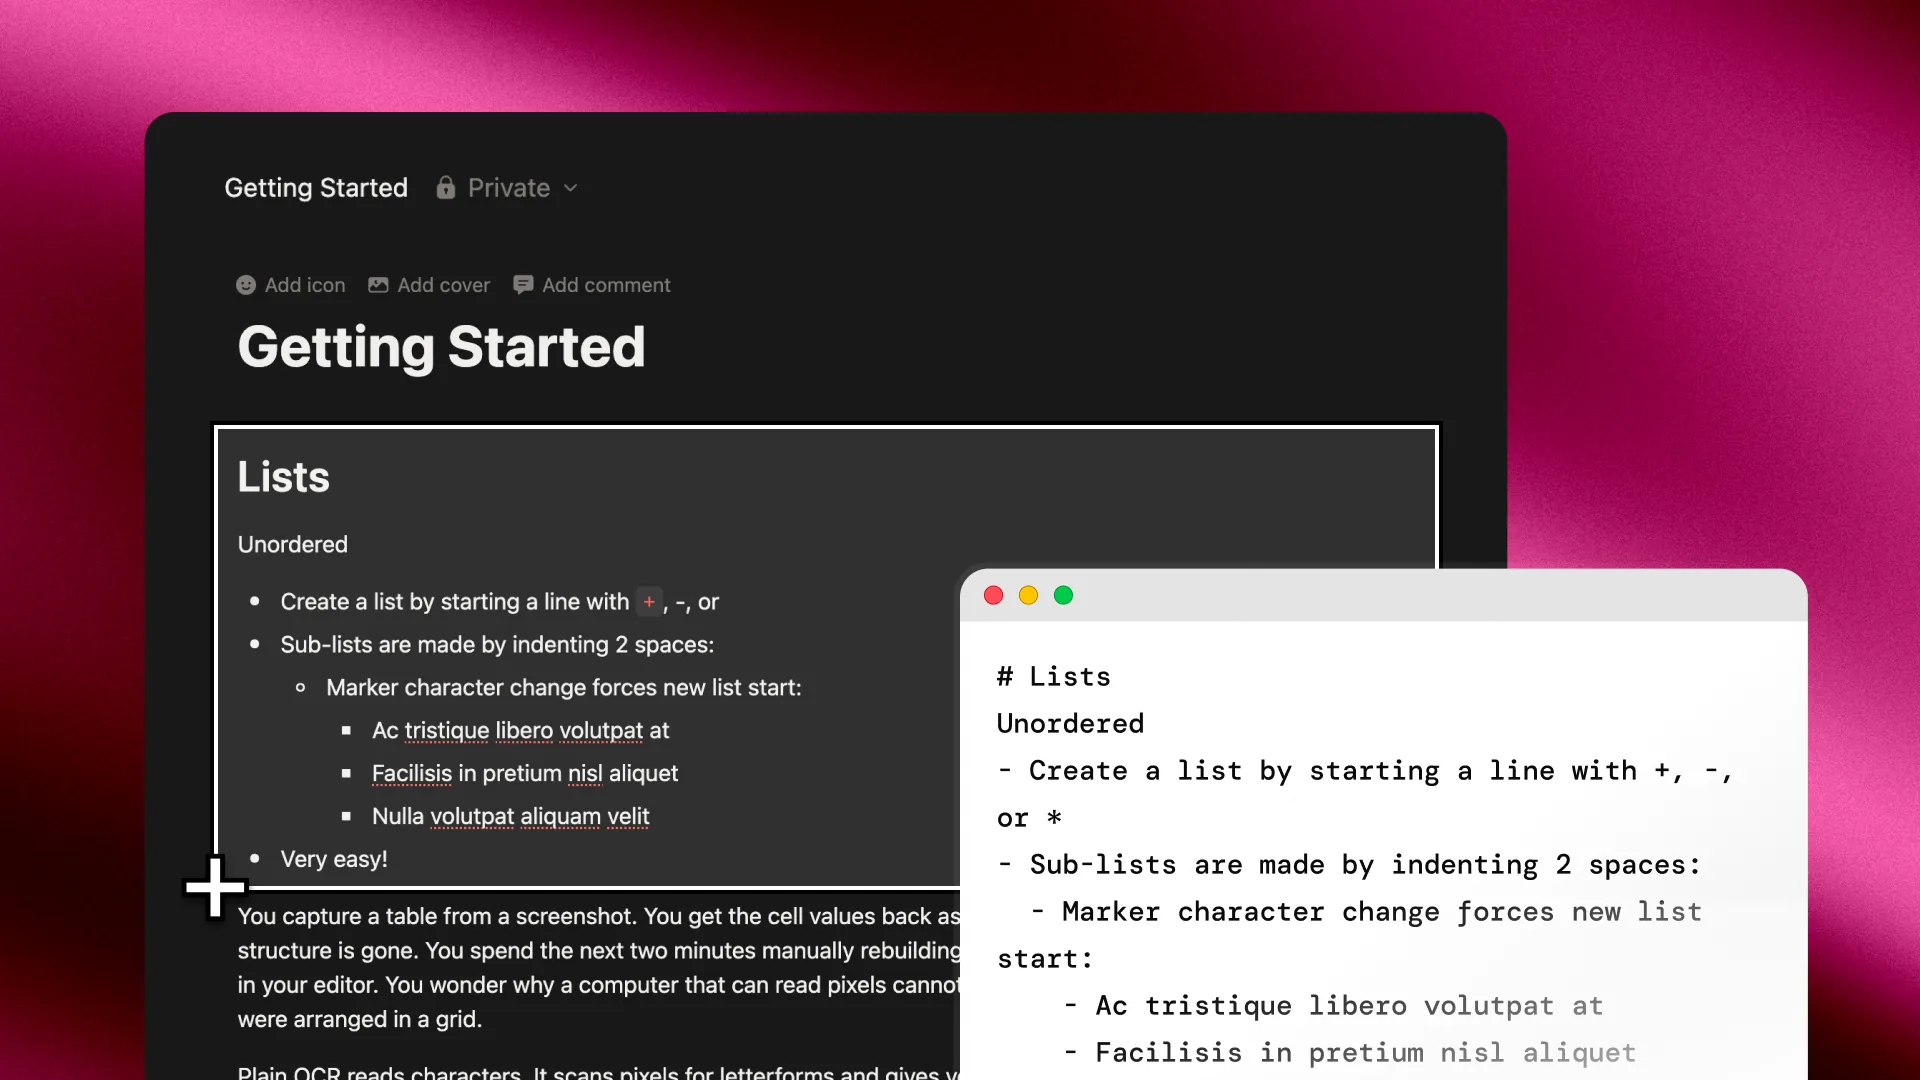
Plain OCR reads characters. It scans pixels for letterforms and gives you back a stream of text. The output is faithful to what is on screen, in reading order, with no understanding of how the text is laid out.
Smart Capture reads structure. It identifies tables as tables, lists as lists, and headings as headings. The output preserves the shape of the original content, formatted as Markdown or JSON.
The same screen region produces different results depending on which one you use. Plain OCR is the right tool for grabbing a sentence or a code block. Smart Capture is the right tool when the layout matters.
Where plain OCR breaks down
The moment you capture anything with structure, plain OCR gives you a flat result. A few common situations:
- Tables. A pricing comparison or a data grid becomes a stream of values with no row or column information.
- Nested lists. A bulleted outline collapses into a single column of text. Indentation is lost.
- Mixed content. A heading followed by a list followed by a paragraph all flatten into one block. You lose the hierarchy.
- Configuration values. Key-value pairs lose their pairing. You see all the keys, then all the values.
The information is there, but you have to rebuild the structure by hand.
How Smart Capture works
Smart Capture runs on Apple's on-device Foundation Models, the same framework that powers Apple Intelligence features across macOS. The flow is the same as any other capture:
- Press the Smart Capture shortcut (⌘⇧1 by default)
- Drag over the content you want
- The text is recognized, structure is detected, and the result is copied to your clipboard
The format toggle in Settings decides whether you get Markdown or JSON. Both run entirely on your Mac. No network, no cloud, no data leaves your device.
What it handles well
Smart Capture is built for content where the layout carries meaning:
- Tables. Output as proper Markdown tables with header rows and aligned columns. JSON output gives you an array of objects, one per row.
- Nested lists. Indentation is preserved up to three levels deep. Bullet points stay as bullets, numbered items stay numbered.
- Headings and paragraphs. Mixed content keeps its hierarchy. A heading followed by a list followed by body text stays in order with the right formatting.
- Prose with structure. Multi-paragraph text with section breaks is handled cleanly.
What this unlocks
- Notes from anywhere. Capture a table from a webpage and paste it directly into Notion or Obsidian as Markdown. No reformatting.
- Data extraction. Capture a structured block from a PDF or screenshot and get JSON ready to drop into a script.
- Documentation snippets. Pull a comparison table from a doc site into your own notes with formatting intact.
- Quick prototyping. Capture a list or schema from a design mockup and have it ready for code in seconds.
Where it has limits
Smart Capture is honest about what it cannot do today:
- Text decoration like bold, italic, strikethrough, and underline is not preserved. The OCR layer does not capture it.
- Code blocks are not detected as fenced code. They come through as plain text.
- Some sans-serif fonts at small rendered sizes can confuse character-level recognition. Letter
Oand digit0are the most common case.
These are upstream limits in Apple's current Vision and AI frameworks. They will improve as the underlying APIs evolve.
Pick the right capture for the job
If you want a sentence, a quote, or a code snippet, plain OCR is faster and works on every supported Mac. If you want a table, a list, or anything where the layout matters, Smart Capture turns the structure back into something you can use.
The shortcut is ⌘⇧1 by default. Customize it in Settings.